That’s where most traders hit a wall. Raw price data jumps around constantly, especially on lower timeframes. Every candlestick feels like a new decision to make. The result? Overtrading, second-guessing entries, and watching profits evaporate because you can’t distinguish real moves from market chop. The emotional toll compounds with each whipsaw, and your account balance shows it.
The MT4 Moving Average indicator addresses this head-on. By averaging price over a specified period, it filters out random fluctuations and highlights the directional bias that actually matters. But here’s the thing—most traders misuse it, turning a valuable tool into another source of losing signals. Understanding how it works and when it fails makes all the difference.
What the Moving Average Actually Does
The Moving Average (MA) calculates the average closing price over a set number of periods, then plots that value on your chart. As new candles form, the oldest data drops off and fresh prices get included. This creates a flowing line that moves with price but responds more slowly than the actual candlesticks.
MT4 offers four types: Simple (SMA), Exponential (EMA), Smoothed (SMMA), and Linear Weighted (LWMA). The SMA treats all periods equally—a 20-period SMA adds up the last 20 closing prices and divides by 20. The EMA gives more weight to recent prices, making it more responsive to current market conditions. That responsiveness matters during momentum-driven moves on pairs like GBP/JPY, where delayed signals can mean missed entries.
The calculation itself reveals why MAs lag. They’re averaging historical data, so by nature, they confirm what’s already happened rather than predict what’s coming. Traders who grasp this use MAs for trend confirmation, not forecasting.
How Traders Actually Use It
The most straightforward application involves trend identification. When price trades above a rising MA, the bias is bullish. Below a falling MA suggests bearish conditions. Sounds simple, but the execution gets tricky during ranging markets, where price constantly crosses the MA without establishing direction.
Take a specific scenario: USD/JPY on the 4-hour chart with a 50-period EMA. During the November 2024 rally, price stayed cleanly above the EMA for weeks, providing consistent trend confirmation. Traders using pullbacks to the EMA as entry points captured multiple legs of that move. But when the pair entered consolidation in early December, those same signals generated losses as price whipsawed around the indicator.
Crossover strategies represent another common approach. The “golden cross” occurs when a faster MA (like the 50-period) crosses above a slower one (200-period), suggesting bullish momentum. The “death cross” signals the opposite. These work during trending conditions but produce late signals. By the time a 200-period MA confirms a trend change, the move might be halfway finished.
Some traders layer multiple MAs—perhaps a 10, 20, and 50-period EMA. When all three align and point in the same direction with price above them, that’s strong trend confirmation. When they tangle together, it indicates choppy conditions where range-trading strategies make more sense than directional plays.
Settings That Make or Break Performance
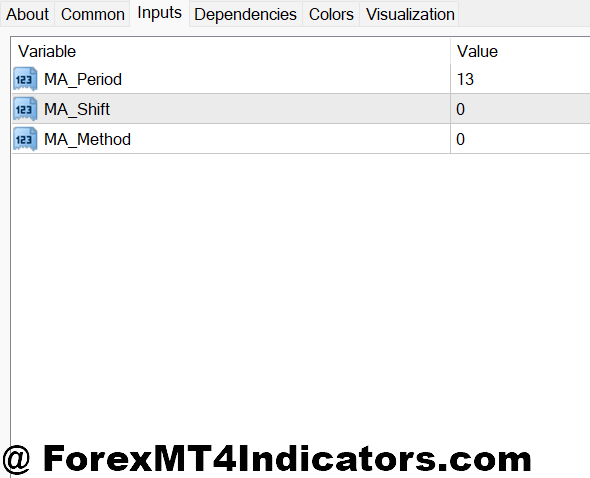
The period setting determines how many candles the MA averages. Shorter periods (10-20) react quickly but generate more false signals. Longer periods (100-200) lag significantly but filter noise better. There’s no universal “best” setting—it depends on your timeframe and trading style.
Day traders on the 5-minute chart might use a 20-period EMA for quick trend reads during London or New York sessions. Swing traders on the daily chart might prefer a 50 or 100-period SMA for broader directional context. Testing this on EUR/USD versus GBP/USD reveals different optimal settings due to how volatility affects each pair.
The MA type matters too. EMAs respond faster, which helps during strong directional moves but increases whipsaw risk during consolidation. SMAs lag more but provide cleaner signals in choppy conditions. The LWMA falls somewhere between, though it’s less commonly used.
Applied price selection lets you choose what the MA calculates from—close, open, high, low, or various combinations. Most stick with closing prices since they reflect where the market actually settled for that period. Using highs or lows can create dynamic support and resistance levels, though this gets into more advanced territory.
The Reality Check: Advantages and Limitations
The MA’s biggest strength is simplicity. It’s easy to understand, quick to interpret, and available on every trading platform. It genuinely helps identify the prevailing trend, which matters since trading with the trend improves probability. The visual clarity makes it useful for beginners and experienced traders alike.
Dynamic support and resistance represent another advantage. Price often bounces off MAs during trends, creating entry opportunities. A 200-period SMA on major pairs like EUR/USD frequently acts as significant support or resistance when tested.
But the limitations are real. MAs lag by design, so signals arrive after the move starts. During sideways markets, they generate consecutive losing trades as price crosses back and forth without establishing direction. The indicator provides zero predictive value for future price action—it only describes what already happened.
Here’s what traders miss: The MA doesn’t tell you when a trend will reverse. It confirms after the reversal already began. Relying on it alone, without price action context or additional confirmation, leads to poorly-timed entries and exits.
How It Compares to Other Indicators
The RSI (Relative Strength Index) measures momentum and identifies overbought or oversold conditions, which the MA doesn’t address. Combining both gives trend direction from the MA and momentum context from the RSI. When EUR/USD trades above the 50-EMA with RSI above 50, that’s confluence suggesting bullish continuation.
Bollinger Bands incorporate a moving average (typically 20-period SMA) plus standard deviations, adding volatility context. The MA alone doesn’t tell you if the market is unusually volatile or calm, which affects position sizing and stop placement.
The MACD (Moving Average Convergence Divergence) uses the relationship between two EMAs to generate signals. It’s more complex but provides momentum information the simple MA lacks. That said, the basic MA remains cleaner and less prone to interpretation errors.
Support and resistance levels drawn from price structure often prove more reliable than MA levels during consolidation. The MA works best when markets trend, while horizontal levels excel during ranges. Knowing when to switch focus between the two separates consistent traders from those who force one tool into every situation.
Making It Work in Real Trading
Start by matching the MA period to your timeframe. Scalpers need faster MAs (5-20 periods), while position traders need slower ones (100-200 periods). Test your settings on historical data, but remember that past performance doesn’t guarantee future results—the market regime could shift.
Use the MA for what it does well: trend confirmation. Don’t expect it to predict reversals or work during consolidation. Combine it with price action—look for MA alignment plus support/resistance tests or candlestick patterns. That’s how you avoid low-probability setups.
Risk management matters more than the indicator itself. A perfect MA signal means nothing if you risk too much and get stopped out by normal volatility. Set stops based on market structure, not just the MA level. Position size according to your account rules, not how confident the indicator makes you feel.
And here’s something experienced traders learn the hard way: When multiple MAs tangle together, step aside. That’s the market telling you it doesn’t know where it wants to go. Trading during those periods increases costs (spread and slippage) while decreasing win rate.
Trading forex carries substantial risk of loss. No indicator, including the Moving Average, guarantees profitable trades. Always risk capital you can afford to lose and never trade based on a single indicator.
How to Trade with MT4 Moving Average Indicator
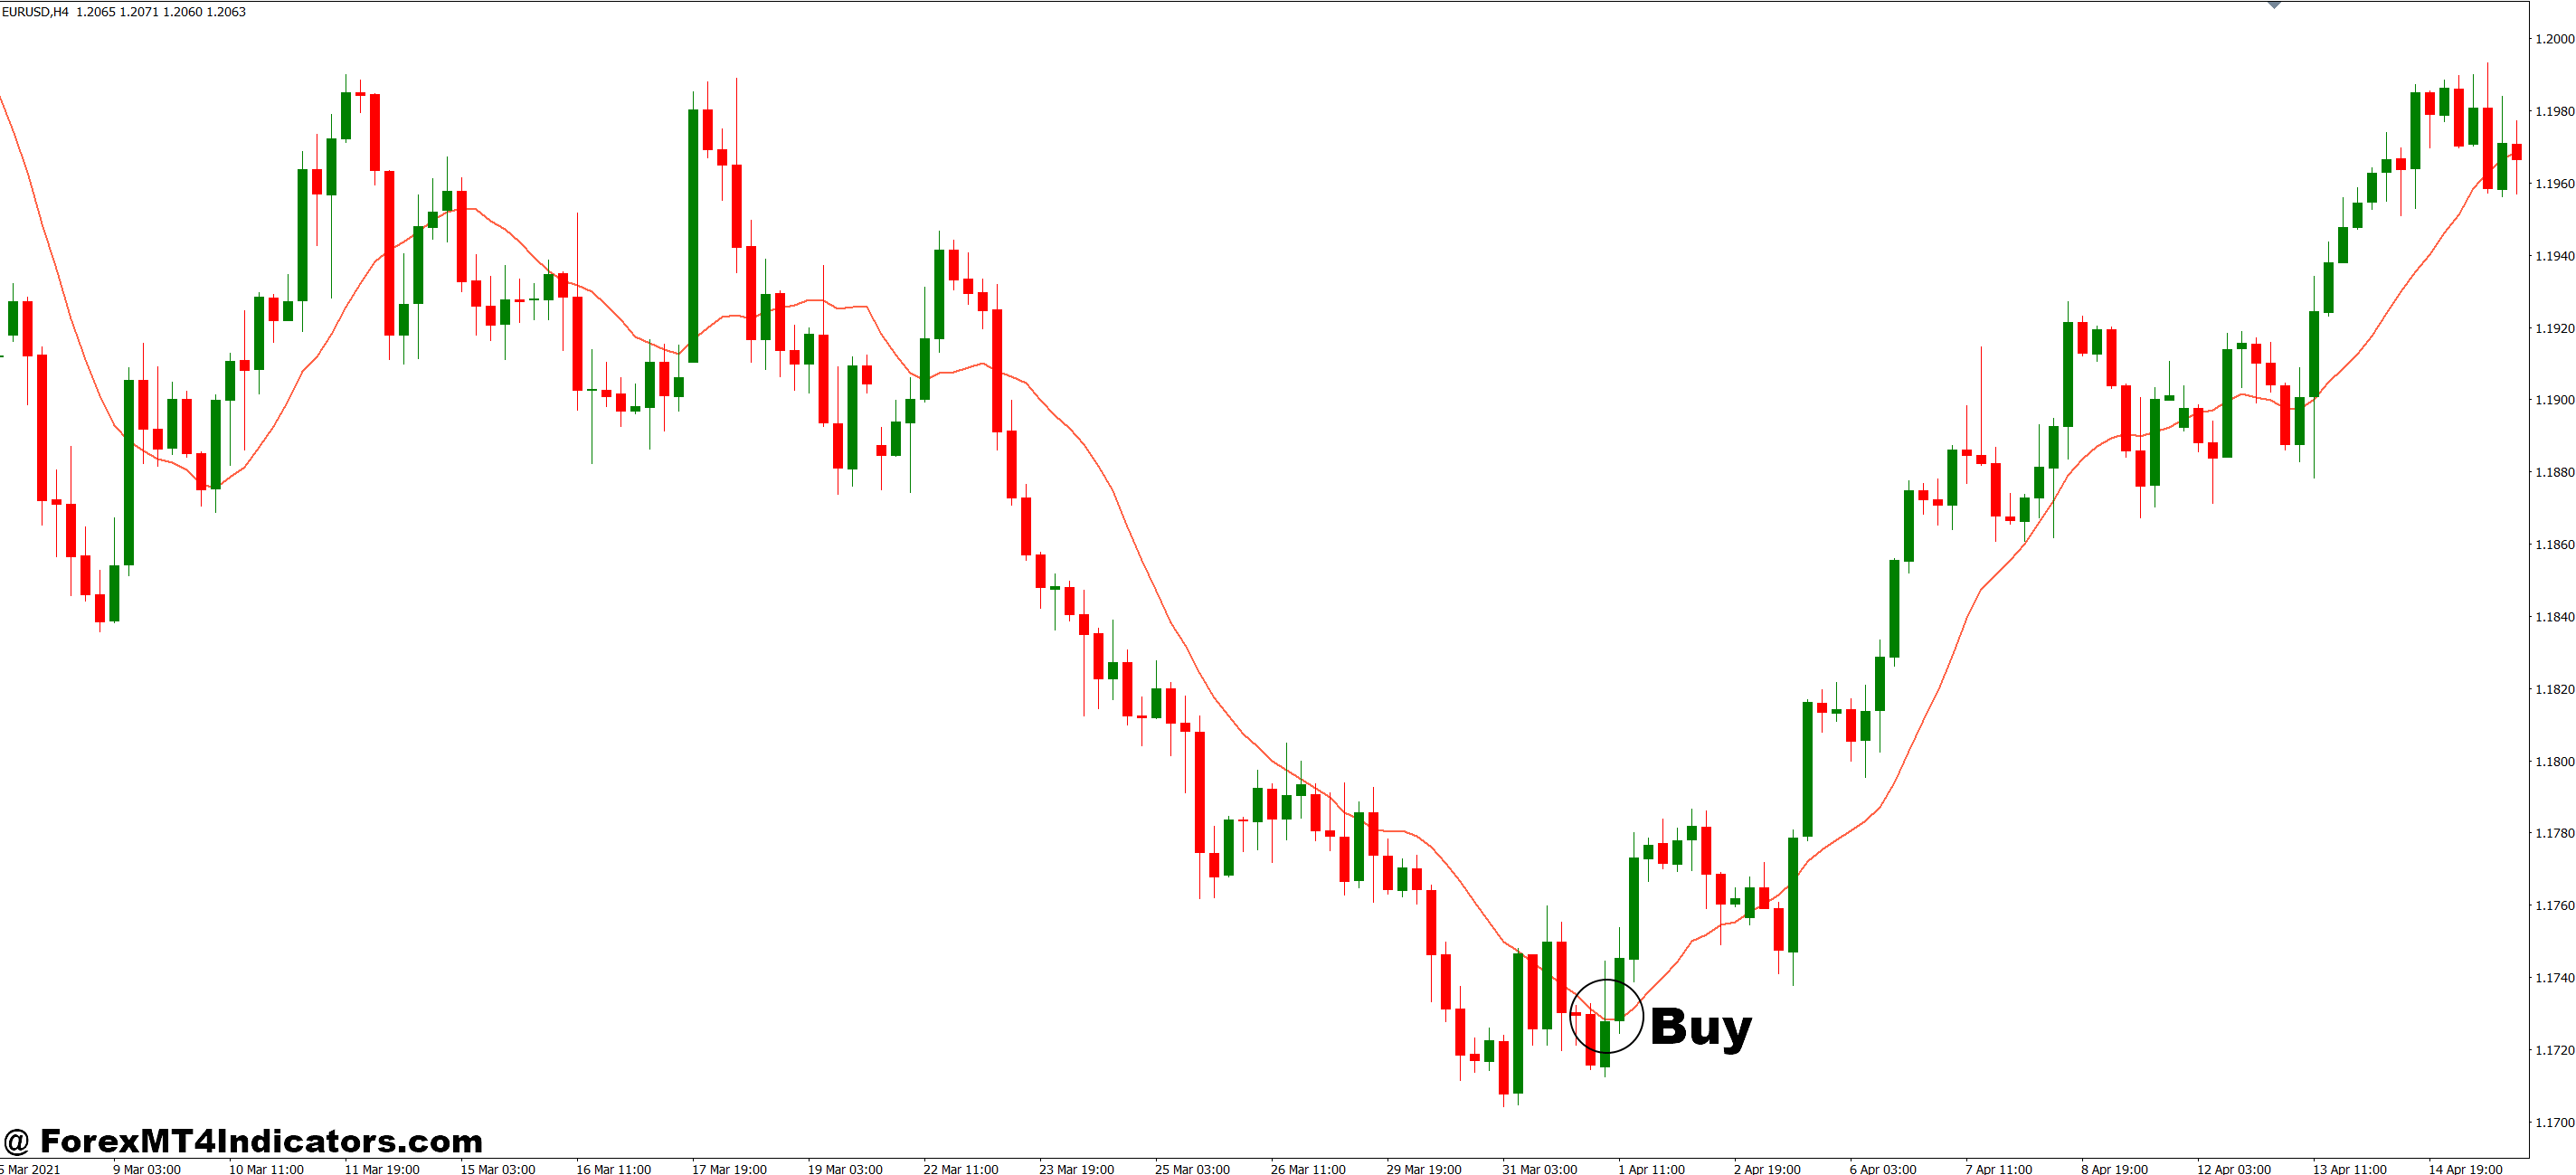
Buy Entry
- Price closes above the 50 EMA – Wait for a full candle close above the MA on the 4-hour or daily chart, then enter on the next candle open with a 20-30 pip stop below the EMA.
- Golden cross confirmation – When the 20 EMA crosses above the 50 EMA on EUR/USD daily chart, enter long with price above both MAs and set stops 40-50 pips below the slower MA.
- Pullback to rising MA – Enter when price touches a rising 20 EMA on the 1-hour chart during London or New York session, but skip if price closes below it or if the MA is flat.
- Multiple MA alignment – Buy when price sits above the 10, 20, and 50 EMAs all pointing up on GBP/USD 4-hour chart, risking no more than 2% of account per trade.
- MA bounce with support confluence – Enter long when price bounces off the 100 SMA that aligns with a previous support level on daily chart, targeting 2:1 risk-reward minimum.
- Price reclaims MA after fake-out – If price briefly dips below the 50 EMA by 10-15 pips then closes back above on the 4-hour chart, enter long but avoid if this happens more than twice in 24 hours.
- 200 MA test during uptrend – Buy when price pulls back to the 200 SMA on daily chart during established uptrend, but only if the MA is angled upward at least 15 degrees.
- Skip choppy conditions – Don’t take buy signals when the 20 and 50 EMAs are tangled together or when price has crossed the MA 4+ times in the last 10 candles.
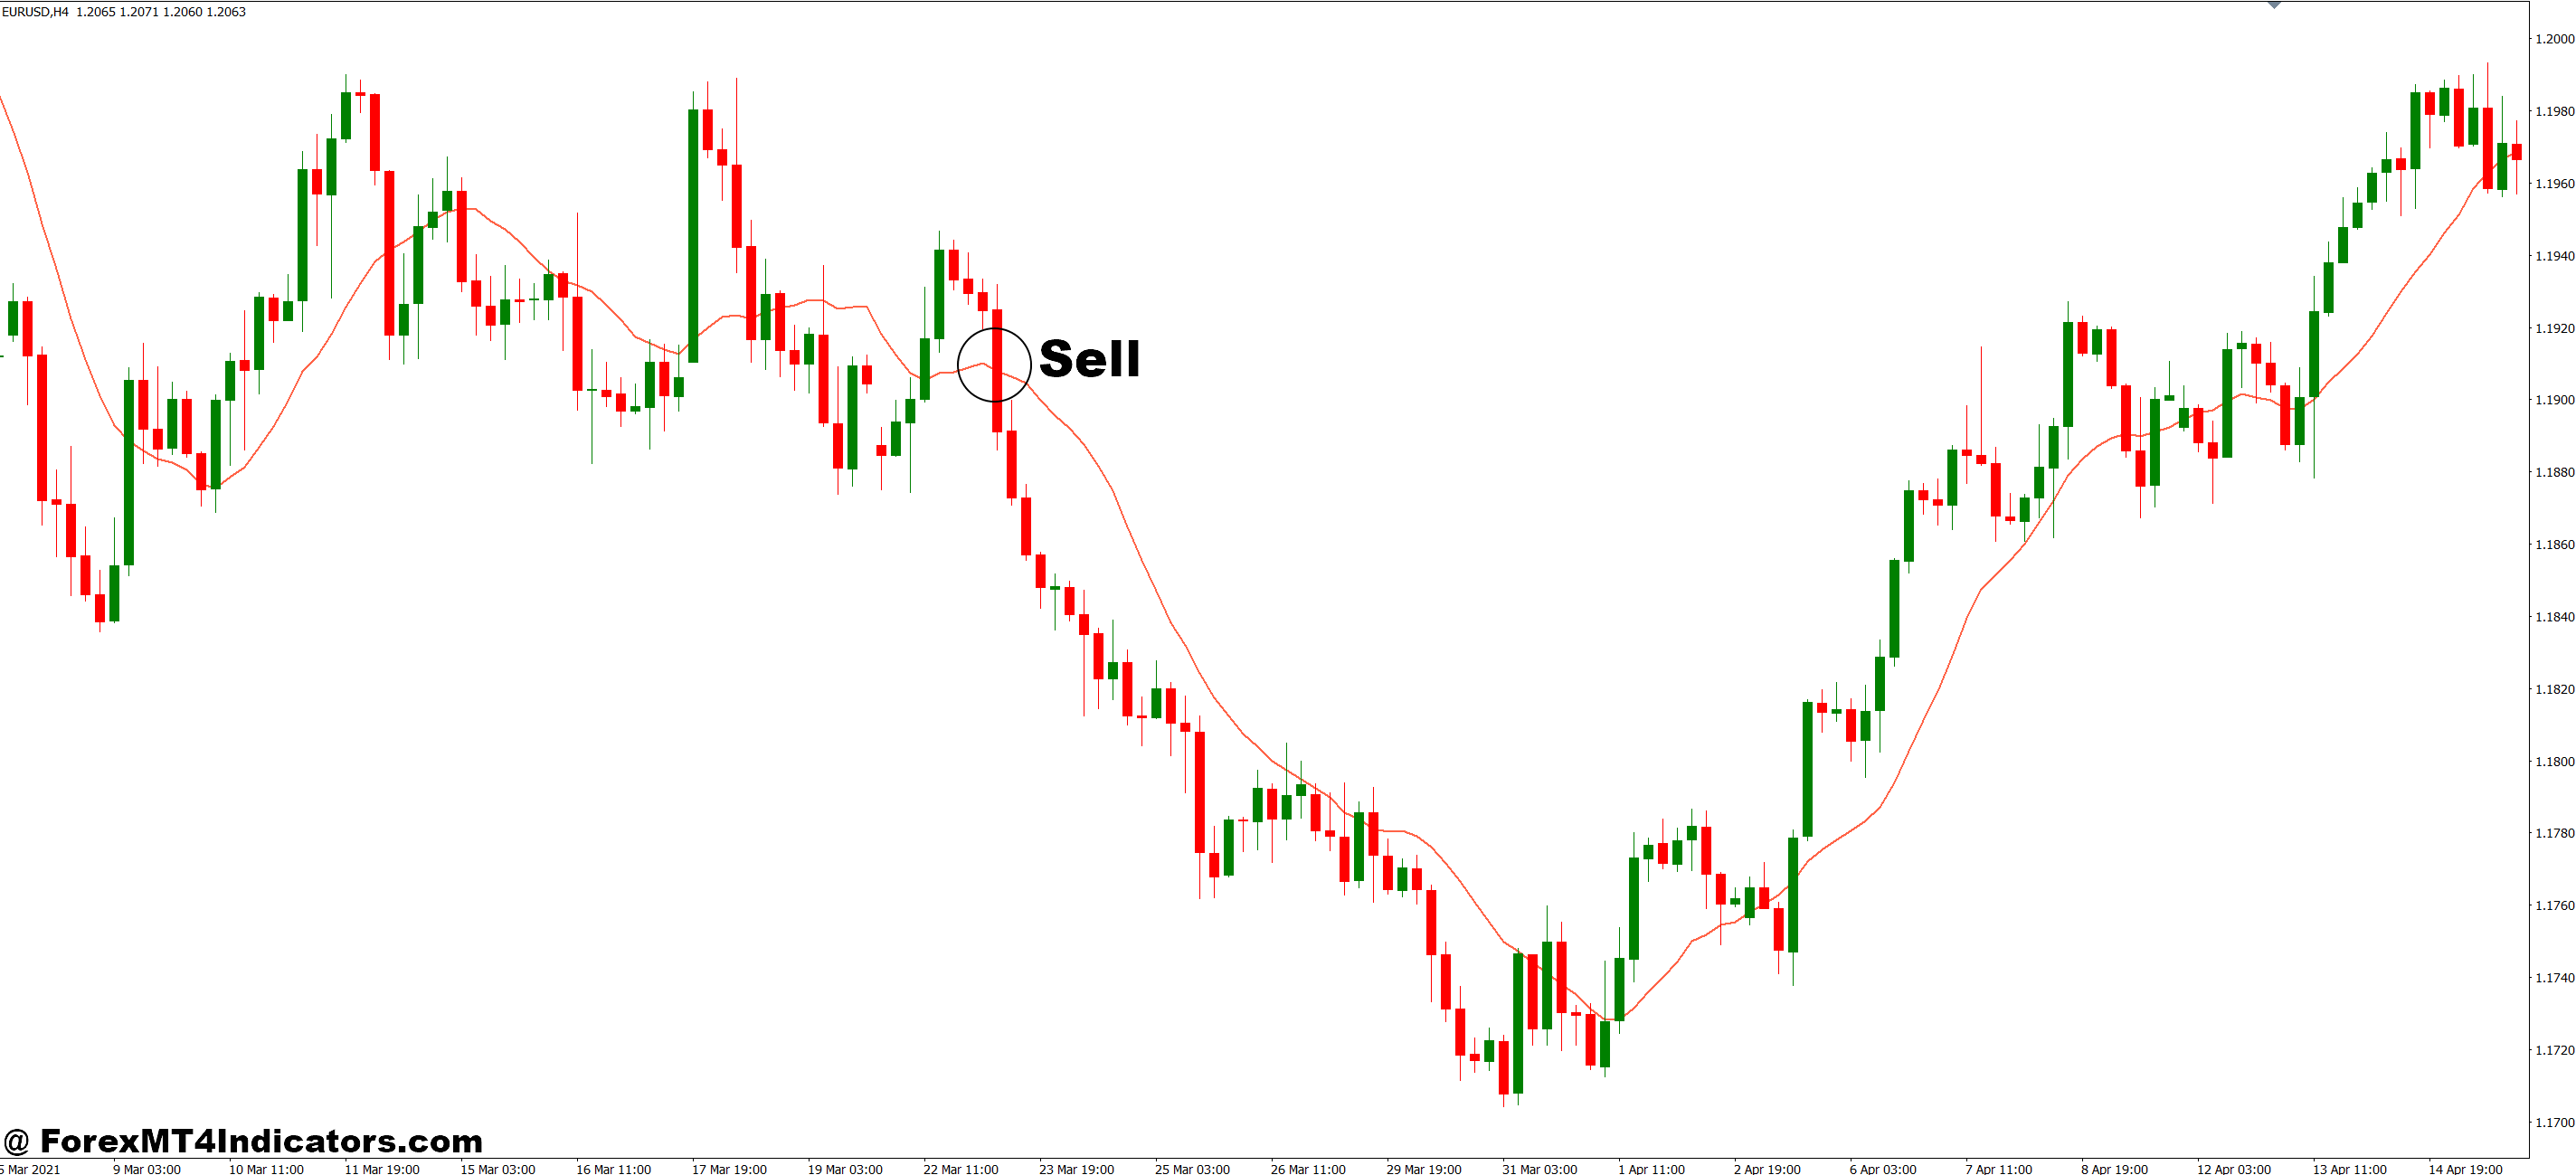
Sell Entry
- Price closes below the 50 EMA – Enter short after a full 4-hour candle closes beneath the MA, placing stops 25-35 pips above the MA level with 1.5:1 minimum target.
- Death cross trigger – When the 20 EMA crosses below the 50 EMA on EUR/USD daily chart with price under both MAs, enter short and risk only 1.5% since lagging signals have lower probability.
- Rejection from falling MA – Sell when price spikes up to touch a falling 20 EMA on 1-hour GBP/USD then closes below it, but avoid during major news events.
- Bearish MA stack – Enter short when price trades below the 10, 20, and 50 EMAs all pointing down on the 4-hour chart, targeting the next support level 80-100 pips away.
- MA resistance with previous highs – Sell when price hits the 100 SMA that lines up with prior resistance on daily chart, using a 40-pip stop above the MA or recent swing high.
- Failed breakout above MA – If price breaks above the 50 EMA by 20 pips but closes back below within 2 candles on the 4-hour chart, enter short immediately with tight 15-pip stop.
- 200 MA rejection in downtrend – Short when price rallies to the 200 SMA during a confirmed downtrend on daily chart, but skip if RSI shows oversold conditions below 30.
- Avoid range-bound markets – Don’t take sell signals when price has bounced between the same 50-pip range for 3+ days or when the MA slope is completely flat.
Key Takeaways for Practical Application
The Moving Average works best as a trend filter rather than a standalone system. It confirms what price is already doing, helping you align with the broader directional bias instead of fighting it. The lag isn’t a flaw—it’s a feature that filters noise, though it also delays signals. Understanding this trade-off helps set realistic expectations.
Different market conditions require different approaches. During strong trends, the MA provides reliable support and resistance levels for entries. During ranges, it generates false signals and costs money. Learning to identify which environment you’re trading in matters more than optimizing MA settings.
The real value comes from combining the MA with other analytical tools—support and resistance, candlestick patterns, momentum indicators. No single indicator captures all market information. The MA shows trend, but you need context from other sources to make high-probability trading decisions.
Start simple. Test a single MA on one pair and timeframe. Learn how it behaves during different market conditions. Add complexity only after you’ve mastered the basics. Most losing traders complicate their approach before understanding the fundamentals. Don’t be that trader.
Recommended MT4/MT5 Broker
XM Broker
- Free $50 To Start Trading Instantly! (Withdraw-able Profit)
- Deposit Bonus up to $5,000
- Unlimited Loyalty Program
- Award Winning Forex Broker
- Additional Exclusive Bonuses Throughout The Year
- Exclusive 90% VIP Cash Rebates for all Trades!
Already an XM client but missing out on cashback? Open New Real Account and Enter this Partner Code: VIP90
(Free MT4 Indicators Download)

Enter Your Email Address below, download link will be sent to you.


